Git Guide
This guide will help you set up your GitHub to work on the Blog site. The images are from my own personal version of this repository but apart from the names everything should be the same.
Setup
-
First you will need to set up a GitHub account. This will be carried out with our associates.
-
Once your account is set up, go to The project repository.
-
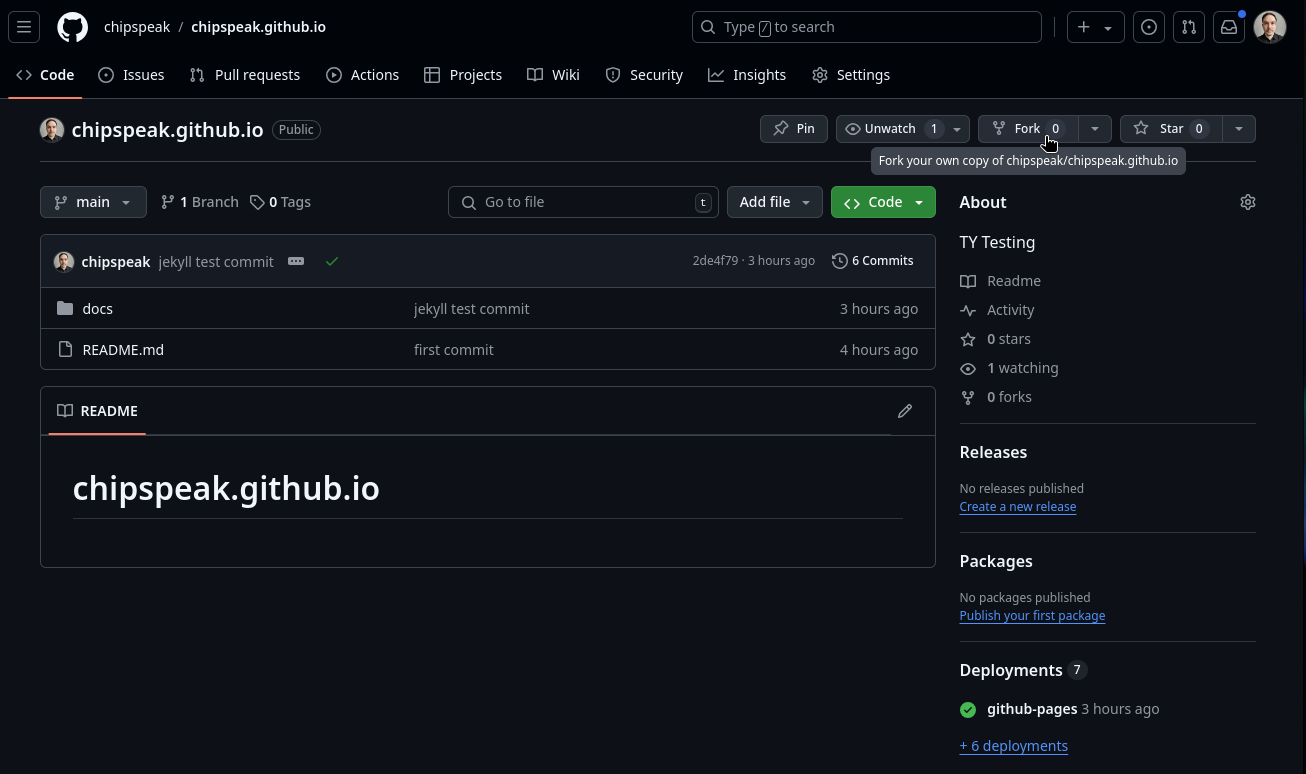
Look for the “fork” button in the top right section of the view. See the below image:

-
Click this button then select an owner for your fork (your GitHub username should appear here) then click “create fork”.
-
Once you’ve created your fork, GitHub should take you directly to it. This should be identical to the project repo for now.
Making Changes
-
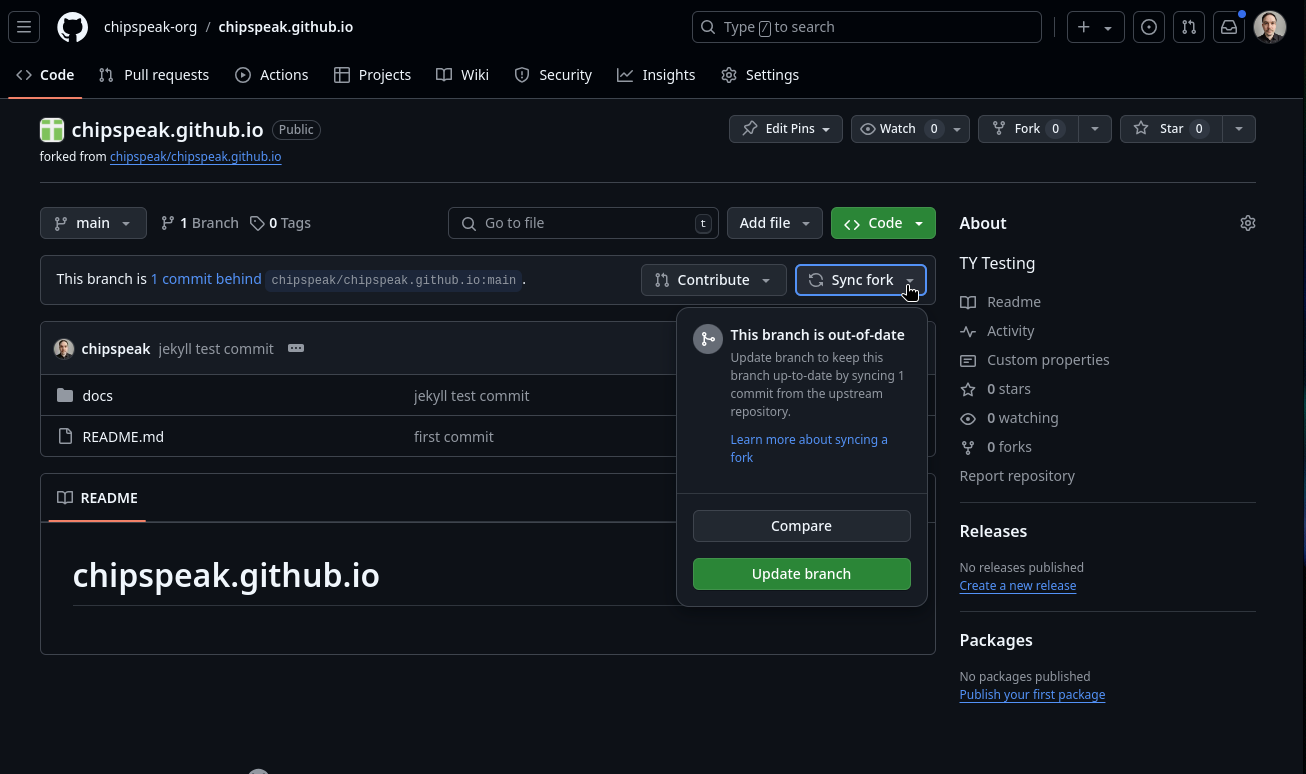
A good practice when working on your code is to sync your fork regularly. Clicking the button will tell you if your fork is after falling behind the main repo. If so, click “update branch” to bring it up to date with the main repo. See below image:

-
To edit your blog, click on the folder labelled “docs” then the folder labelled “_posts” before finally clicking on the file with your name. It will have the format “YYYY-DD-MM-yourname.markdown”.
-
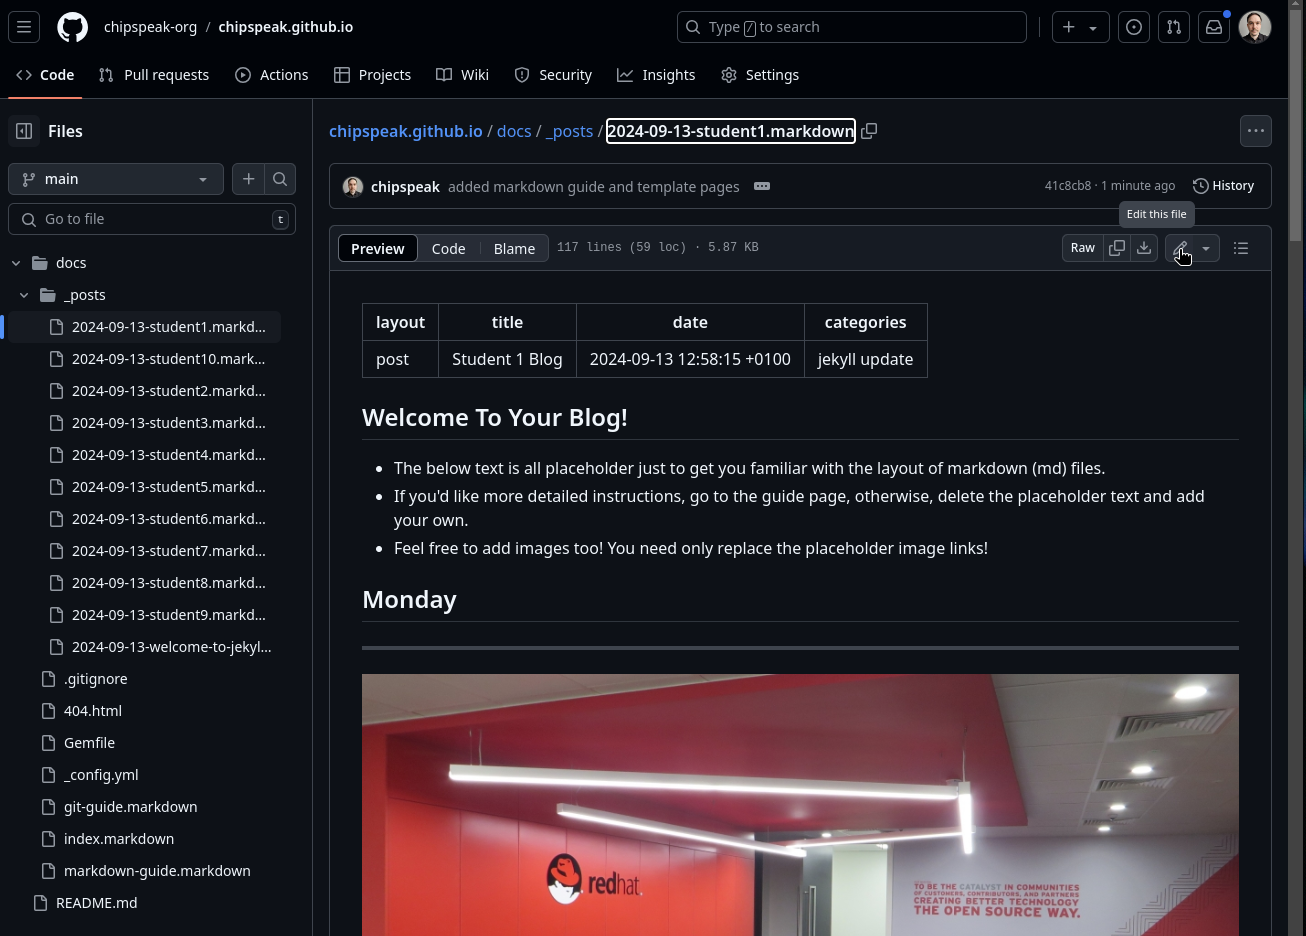
When this file is open it should look similar to the below image. Click the button that looks like a pencil.

-
When you’ve made your changes, click the green button in the top right labelled “commit changes”. Enter a commit message to help you track your changes.
Opening a PR(Pull Request)
-
You’re now ready to submit your changes to the main repo. Return to main page of your fork (you can do this by clicking the name of the repo in the top left of the screen, next to your username).
-
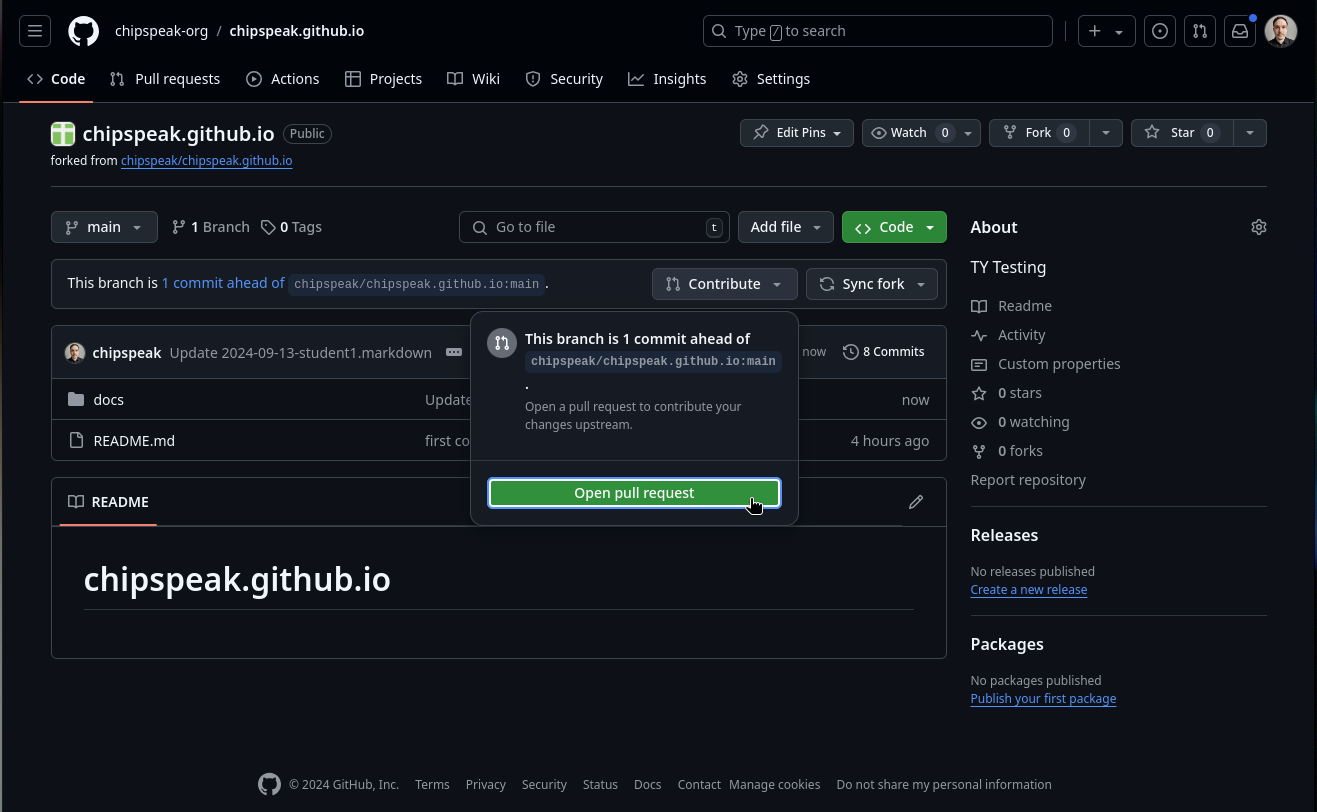
Next to the “sync fork” button we clicked earlier, you should see a “contribute” button. Click this and then “open pull request”. See the below image for reference.

-
Once you’ve added a comment and hit “create pull request”, your code is ready for review. Congratulations on your first PR!