Site Creation Guide
If you want to take the next step from contributing to this site, and create your own, this guide will walk you through the simplest way to achieve this.
Creating your repo from our Template
-
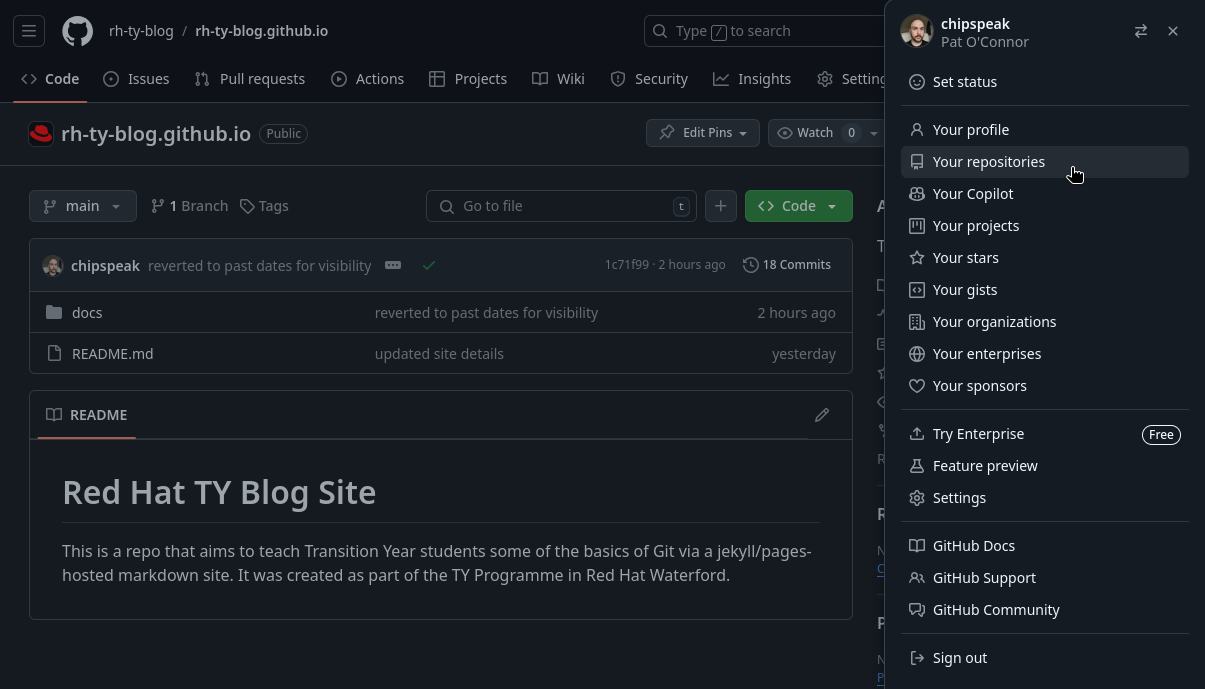
Open your webrowser and go to “https://github.com/YOUR_GIT_USERNAME?tab=repositories” or click your avatar in the top right of the screen if you already have Github open. From the dropdown select “Repositories”. See the below image for reference.
-
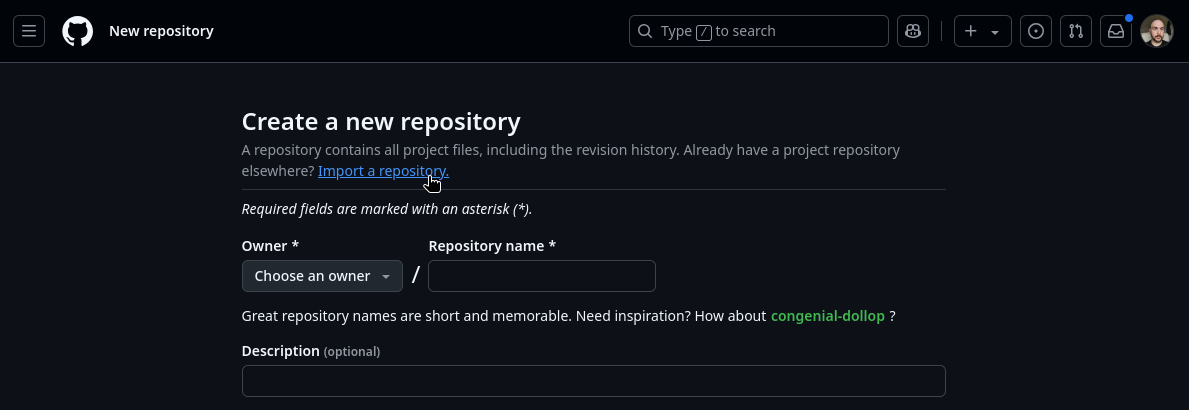
Next, click the the green “New” button in the top right. You can ignore the fields and simply click “Import a repository” as seen in the screenshot.
-
On the next screen, look for the “The URL for your source repository” field. Paste “https://github.com/rh-ty-blog/rh-ty-blog.github.io.git” into this field.
-
On the bottom of the page click “Choose an owner” and select your account.
-
Finally, name your site with the format: “YOUR_GIT_USERNAME.github.io”. It must be this format. Click “Begin Import” to proceed. See the below image for reference if you get stuck.

-
Once this has been completed Github will take you through some loading screens. Once this has completed return to your repositories page and you should see your new repo.
Setting up the site
-
Before our site is live, we’ll need to make some changes to the code. From your repository view, click the “docs” folder icon. This is the same button we clicked when editing pages in our other guide.
-
Next, click “_config.yml” and then the “edit this file” button in the top right (the same pencil button we’ve already used in our blog).
-
Here you can change “title” and “description” to whatever you’d like. Be sure to avoid special characters however e.g ‘*^ etc.
-
You’ll need to change “url” to match the format: “https://YOUR_REPO_NAME.github.io/” and “username” to match your own.
-
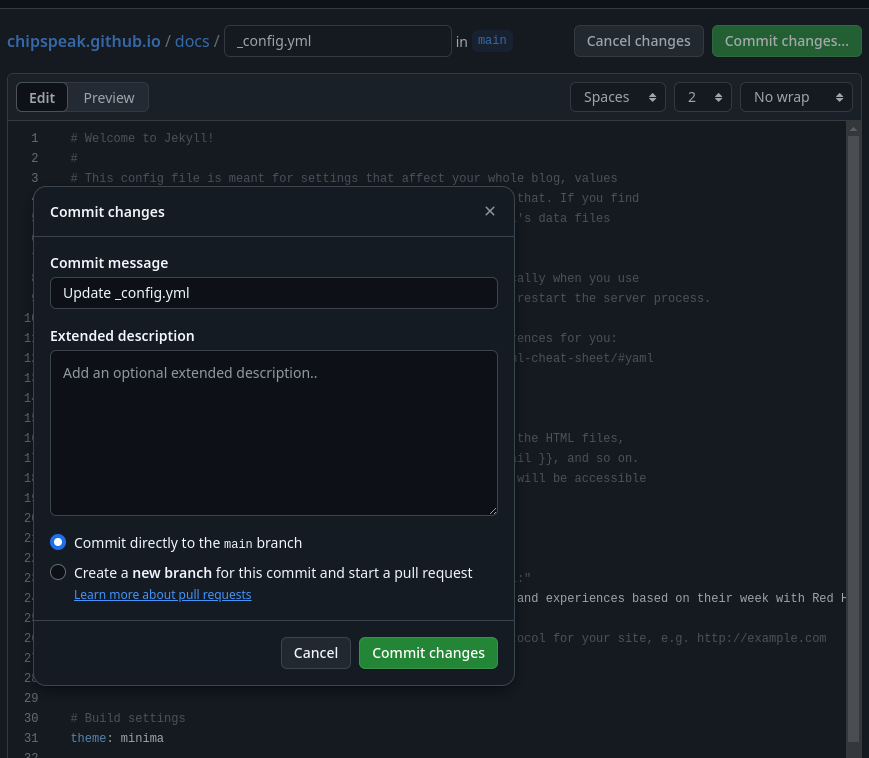
Once you’ve done this, click the “commit” changes button and then the same in the subsequent popup seen below.
-
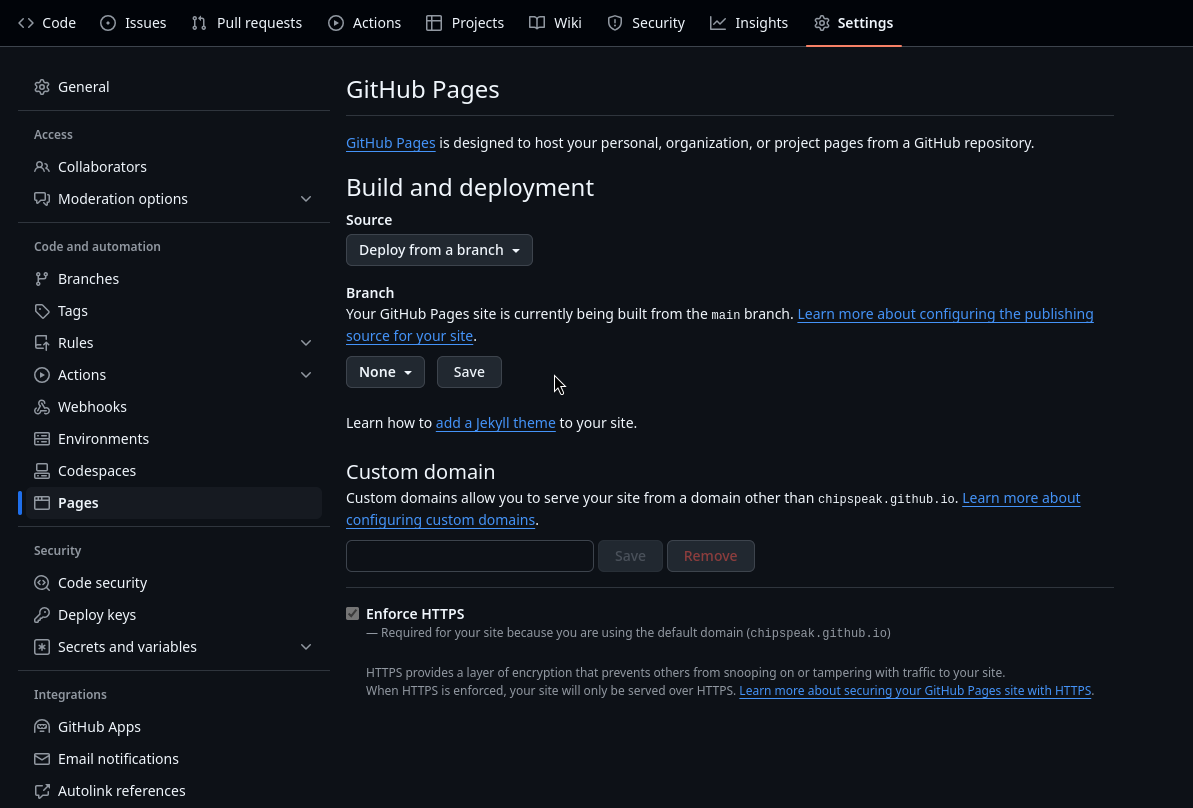
Once you’ve commited the changes, look for the “settings” button towards the top of your current view. Click this button and then look for “pages” in the left sidebar. You should arrive at a page similar to the one below.
-
On the above page, under “Branch” click the button that says “None” and change it to “main”.
-
Next, change the folder symbol that just appeared and says ”/(root)” to “/docs” and hit “save”.
-
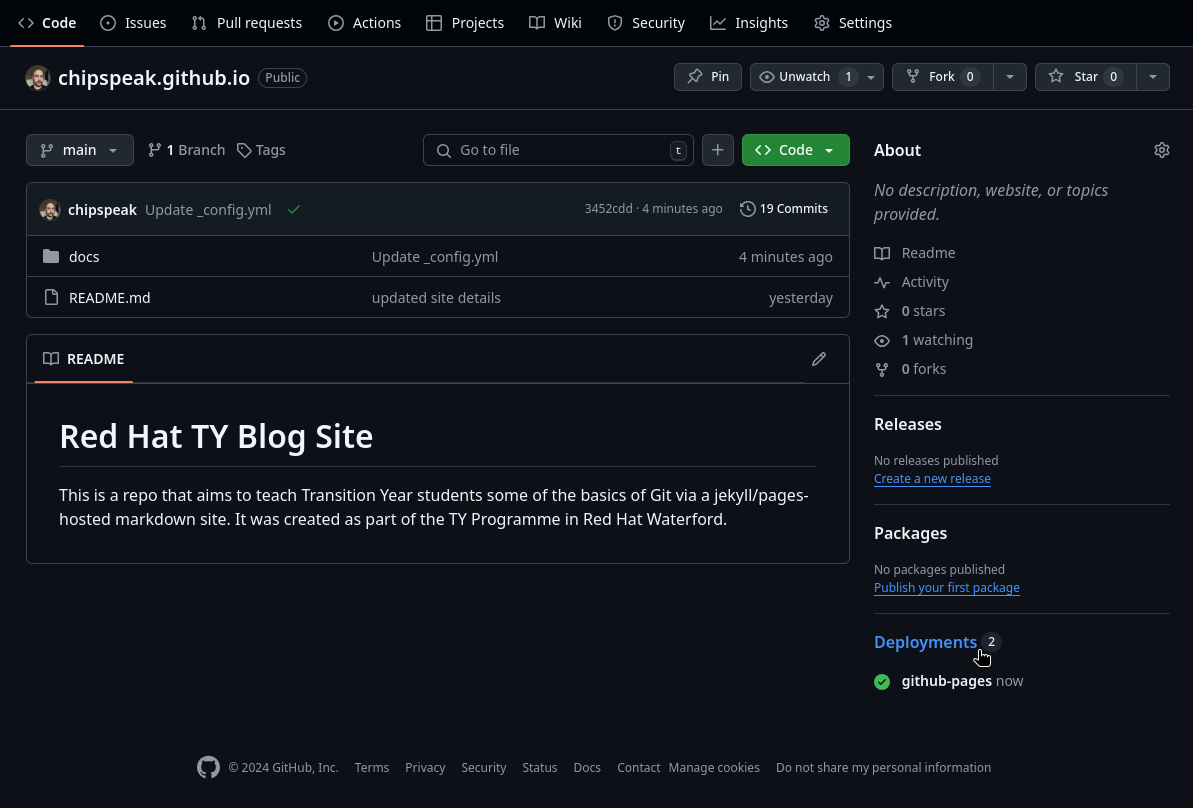
Return to the top level of your repo (easily achieved by simple clicking the repo name at the top of the screen). You should see a yellow circle next to your latest commit (if you’ve followed this guide it will be “Update _config.yml”). This means Github pages is now attempting to build and deploy our blog site.
-
Wait until this symbol becomes a green tick. If it’s taking too long, try refreshing the page. You should get a view like the below image.
-
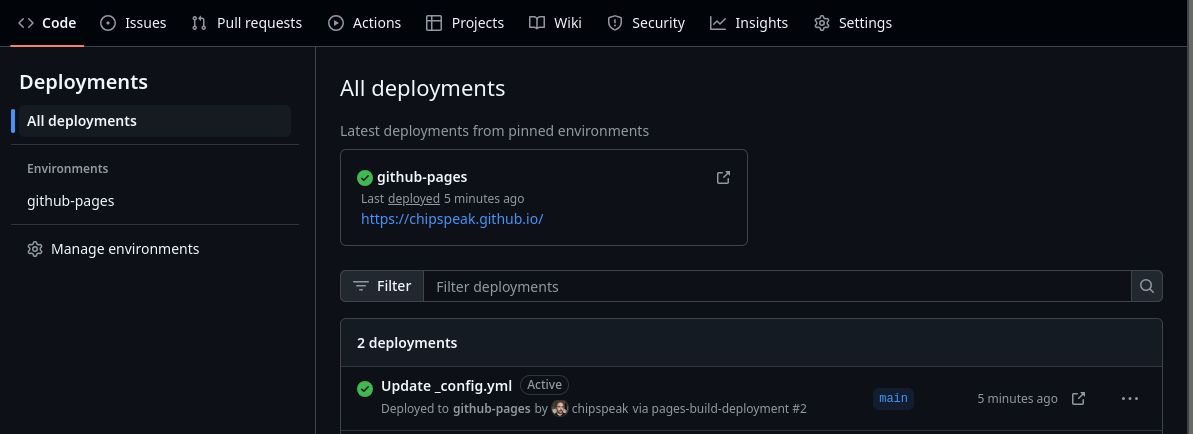
Notice that we have a new section on the right side, “Deployments” as seen above. Click this and it will take you to a view similar to the one below.
-
In the center of this screen you should see a green tick next to “github-pages”. Click on the link below this. It should match the URL we manually entered in our config file earlier: “https://YOUR_GIT_USERNAME.github.io”. Clicking this link will take you to your deployed blog site.
Removing blogs other than you own
-
Congratulations on getting this far, you now have your own blog site! The next step would be to delete all of the other students entries.
-
Returning to the top level of your repo, click “docs” then “_posts”.
-
Click on the file you want to delete and then look for the “…“ button on the top right section of the screen. Click this.
-
In the dropdown, select “delete file”.
Creating a new entry
-
To create a new entry, navigate to “docs/_posts” once again.
-
Next to the “…“ button mentioned earlier you wil see an “Add file” dropdown button. Click this and then “Create new file”.
-
The naming structure of your file is vital as it plays an important part in the building of the site. The structure must match the following format: YYYY-MM-DD-name_of_your_entry.markdown.
-
Once you’ve named the file, paste the below text into the contents area (use the current date but don’t adjust the time and ensure the title is wrapped in “ “)
---
layout: post
title:  "tile of your blog"
date:   YYYY-MM-DD 12:58:15 +0100
categories: jekyll update
----
Once you’ve done the above hit “commit changes” and then the same on the subsequent menu, adjusting the commit message as you see fit.
-
Return to the main repo page and you can observe the build this has triggered. Once the yellow dot has become a green tick, visit your site again to observe the changes.
Removing the extra pages
-
To remove this guide and the others repeat the above process but for the .markdown files within the “docs” directory.
-
If you wish to refactor them or create new ones the process is also the same but ensure that the following is present in each file (making sure that the permalink matches the file name with the .markdown extension dropped):
---
layout: page
title: Git Guide
permalink: /git-guide/
---